
The demand to record iPhone screen on Mac has existed for a while, but it requires a lot of work before doing this. Luckily, nowadays there are some good solutions to make the task easier. Take a look at the following content to get tips on how to do this.
Easiest Methods for You to Record iPhone Screen on Mac
ApowerMirror – Wirelessly Record iPhone Screen on Mac
ApowerMirror is a versatile screen streaming app for Mac and Windows PC. Both your Android and iOS devices can be mirrored to your computer. One of its additional features is the recording function. Users can record iOS devices’ screen on Mac in real time with this program.

- Download and install ApowerMirror on your Mac.Download
- Swipe up from the bottom of your iPhone screen. Choose “AirPlay Mirroring” > “Apowersoft” for those devices running iOS 10 or above.
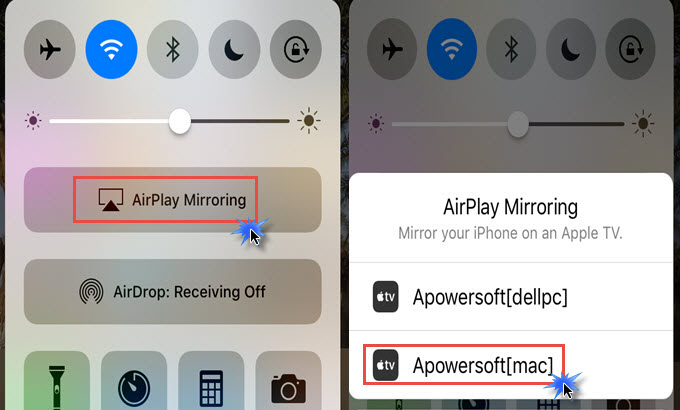
- If your iPhone is running below iOS 10, you need to click in sequence “AirPlay” > “Apowersoft” > “Mirroring”. After this, you will find your iPhone screen displayed on your Mac.
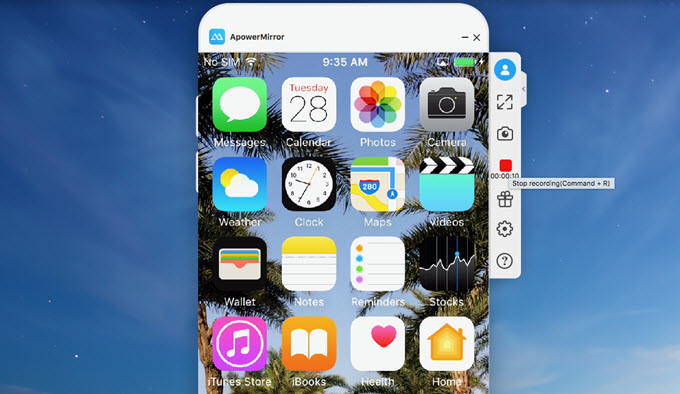
- Once you connect your iPhone with Mac through WiFi, you can record iPhone screen from Mac along with audio by clicking “Start recording” button or you can use the shortcut option “Control-R”.


As a versatile application, you can also use it to stream video from phone to computer for enjoyment. You can also make full use of it to make presentations to your colleagues and friends. This app is fully compatible with iOS devices, so you can also use it to record ios screen on Mac.
QuickTime Player – Default way to Record iPhone Screen on Mac
If you don’t want to use the method mentioned above, you can use the default way on Mac. QuickTime Player is a widely-used media player developed by Apple and it is a pre-installed recorder in your Mac OS. Now if this is your preferred method, follow the instructions below on how to record iPhone screen on Mac with QuickTime.
- You first need to connect your iPhone with Mac via a USB cable.
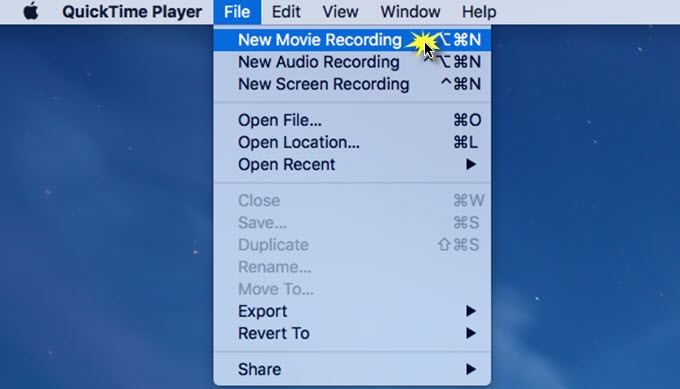
- Launch QuickTime on your Mac. Click the “File” menu and then locate “New Movie Recording” from the menu. Or you can adopt keyboard shortcut option “Command-N” as an alternative. In this way, a new QuickTime window will pop up, where you can use it to record iPhone screen on Mac.
- QuickTime will activate the built-in iSight camera on your Mac by default. Click the small arrow next to the record button and then tap on iPhone as the recording source. Then you manage to record whatever you’re displaying on your iPhone. By the way, QuickTime can serve the same purpose if you also want to record iPad screen on Mac.

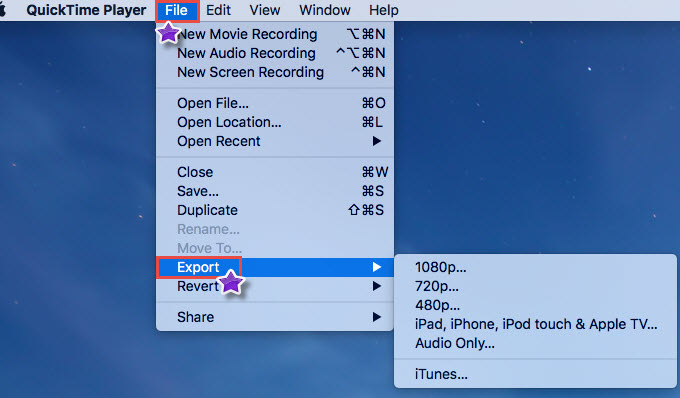
- Hit the “Stop” button in the QuickTime window once you finish the recording. You can save the recording in MOV format on your Mac, or save it in other formats optimized for certain devices by clicking “File” > “Export”.


Comparison
ApowerMirror is a great piece of software to mirror and record your iOS devices on computer and is highly praised for its safety and steady performance. However, if you don’t want to install a third-party app like ApowerMirror on your Mac, you can use the default QuickTime Player to record iPhone screen on Mac, but bear in mind that there is a noticeable lag between what is performed on your device and what is displayed in the QuickTime window.
Leave a Comment