Voice Memo is really a convenient and practical tool for iPhone users. With it, you can record favorite songs, important interviews, wonderful lectures etc. However, after you record hundreds of or more voice memos with iPhone, you’ll find that most storage of your phone will be occupied by these items. At this moment, you may want to export them to your computer. On the one hand, it will free up your iPhone space. On the other hand, such a measure can also help you back up important voice memos in case of a sudden crash of iPhone.
Nice Ways to Transfer Voice Memos from iPhone to PC
ApowerManager – Export Voice Memos to PC Easily
This phone manager can help users to view, manage, transfer, backup, and restore their iPhone data. And it is especially renowned for its excellent transfer ability. Follow the steps below and you’ll know how to export your voice memos to PC.
- Search this tool on Google Chrome or click the button here to download and install this tool on your PC.
- Connect iPhone to PC with attached USB cable. Tap “Trust” when a pop-up window appears on iPhone screen. Then your iPhone will be connected to PC successfully.
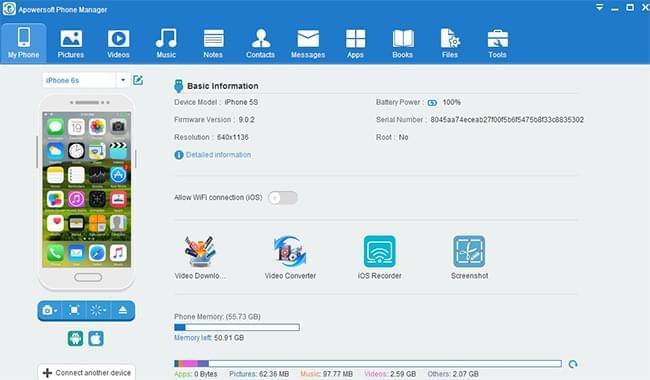
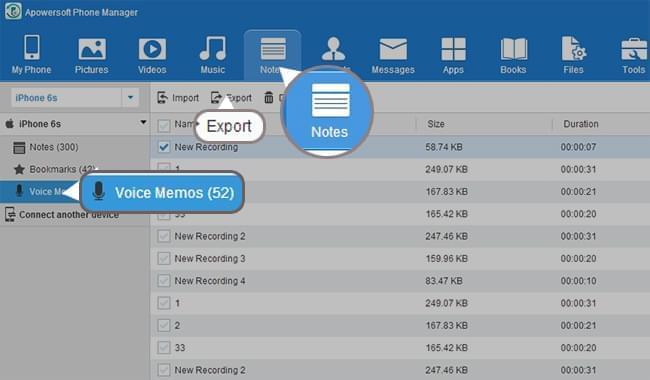
- On the interface of this app, click “Notes” > “Voice Memos” and select items you want to transfer, then tap “Export” button on the top. Within seconds, they will be transferred to your computer.


Tips:
- In order to connect successfully, please make sure you’ve installed the latest iTunes on your PC. If not, you have to download and install one, but you needn’t start it when using this phone manager.
Sync Voice Memos via iTunes
iTunes, belonging to Apple Inc, is a default transfer tool for iOS users. Though this tool is well known for its complicated and awkward operation process, lots of users still prefer to be its loyal fans only because it’s developed by Apple Inc. Now, let’s see how to transfer voice memos from iPhone to PC with iTunes.
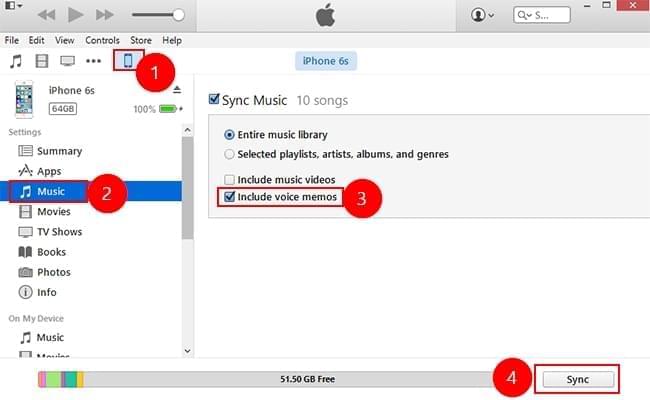
- Run iTunes on PC and connect iPhone to PC with matched USB.
- Click iPhone icon, then “Music” under “Summary”.
- Tick the boxes for “Sync Music” and “Include voice memos”.
- Click the “Sync” button at the lower right corner.
Cons:
- Due to the complicated interface, you may be at loss when you use it for the first time.
- The whole sync process will take you half an hour or more if you have hundreds of voice memos to transfer.
Share your Voice Memos via Email
If you are unwilling to download any apps on your PC, you can also share your voice memos via email on iPhone.
- On your iPhone, select the item you want to share.
- Click the share button on the left and “Mail” from the options.
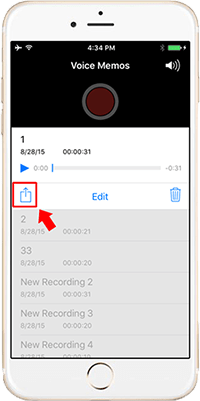
- Select your most commonly-used mailbox and then send this email.
- Log into the same email account on PC. Then you can download this voice memo to PC.

Cons:
- Your iPhone and PC should be connected to internet.
- With this method, you can only share one item at a time.
Conclusion
From the detailed introduction above, you’ll know how to transfer voice memos from iPhone to computer. However, taking the cons of iTunes and Email into consideration, Apowersoft Pone Manager will be your best choice. With it, you can export your voice memos from iPhone to PC like a breeze!
Leave a Comment