
Good memories need to be saved and cherished. Thus, people use phones to shoot videos to preserve memories. However, the storage of iPhone is limited, you can’t put all your videos on your iPhone. So, you need to move your videos, which occupy large space, to somewhere else. Many Mac users wonder how to transfer videos from iPhone to Mac? Here are some methods you can try.
Guide on How to Transfer Videos from iPhone to Mac
Transfer with AirMore
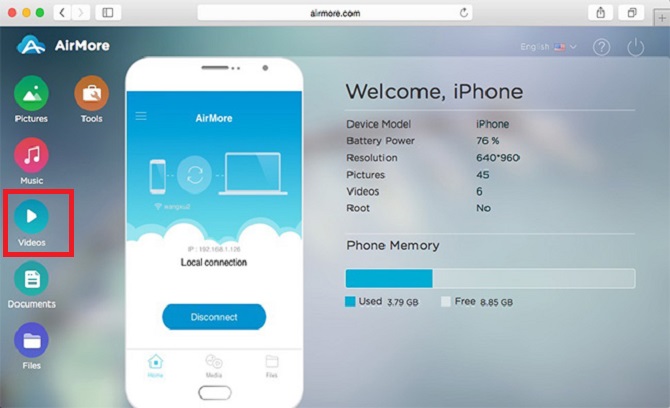
AirMore is a free app that can help you transfer files between iPhone and Mac. It costs little storage space on your phone and you do not need to download on your Mac. The most striking feature of this app is that it works without a cable. It perfectly solves USB problems and could show all camera rolls on your computer. Below are steps how it works to import videos from iPhone to Mac.

- Download “AirMore” app to your iPhone and open it.
- Go to “airmore.com/web.html” on your Mac.
- Check iPhone and Mac connecting on the same network. And click “Scan to connect” on your iPhone to scan the QR code on Mac screen.
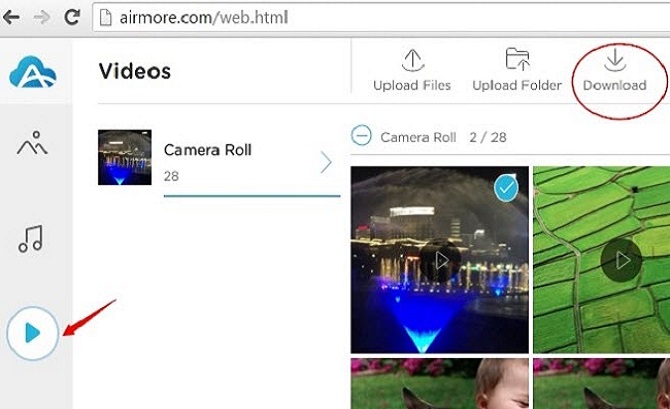
- Choose “Accept” on the phone. Open “Videos” function on Mac to view and select videos.
- Click “Download” to transfer videos to your Mac.


Pros:
- You can connect iPhone to Mac without a USB cable
- There is no storage limit.
- It is easy to run this way.
- It could be applied to most of the versions of Apple devices.
Cons:
- It works on the Wi-Fi.
Transfer with iCloud
iCloud is a cloud service to help users store data on remote servers. Once you upload your files to iCloud, you can get those files on all your Apple devices with your ID.
- On your iPhone, open “iCloud” button under “Settings” and click “Photos” to turn on “iCloud Photo Library”.
- Turn on Wi-Fi so that videos can be uploaded to iCloud automatically.
- On your Mac, go to the icloud.com and log in with the same account on your iPhone.
- Open “Photos” and select videos you want, click download button on the top to import videos from iPhone to Mac.


Pros:
- Videos can be copied to iCloud as network opens.
Cons:
- You need to connect network.
- iCloud only has 5 GB free storage.
- It takes some time for iCloud to refresh videos.
Transfer with Photos App
Photos is a Mac built-in app. You can move videos from iPhone to Mac without using iCloud Photo Library.
- Connect your iPhone to Mac with a USB cable and click “Trust” when a prompt shows up on your iPhone.
- Open the Photos app on your Mac and click “Import” on the top of the window.
- Choose videos you want and click “Import Selected” button on the upper right side.


Pros:
- You can transfer numerous videos quickly.
Cons:
- You need to connect Mac and iPhone with a cable.
- It could only work for OS 10.10.3 or later version.
Conclusion:
The article provides ways with and without a cable to transfer videos from iPhone to Mac. After comparison, AirMore is convenient and easy to use, as method two needs more iCloud storage and method three needs a USB cable. You can download this app to your iPhone so that you could import and export files freely.
Leave a Comment