Windows 10 is believed to be a much-improved Windows 8, because it has overcome one of Windows 8’s biggest shortages. Windows 10 sets the Start menu in the lower left-hand corner of the desktop and gathers a series of apps and functions in the Start screen. For its excellent and stable performance, millions of users have turned to this newest edition. However, when switching to a new operating system, users may become unfamiliar with transferring photos from Android to Windows 10. Don’t worry. Here we are going to specifically show you how to add Android photos to this newest Windows system.
Two Methods on Moving Photos from Android to Windows 10
Transfer photos from Android to Windows 10 with Phone Companion
The Phone Companion is a new app on Microsoft for Windows 10, which can help you to import the whole photo library from your Android phones to your PC. It can also automatically move photos you take with your device onto PC.
Plug Android into your computer with matched USB cable. If you haven’t launched Phone Companion app yet, click the “Start Menu” to begin with. Make sure your Android device is in MTP transfer mode.
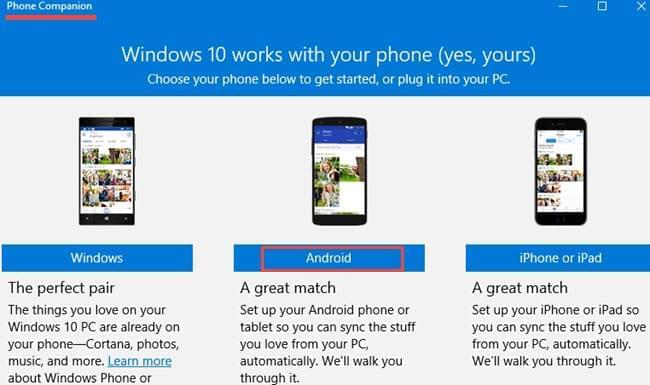
After successful connection, you will see Phone Companion interface and then choose “Import photos and videos into the Photos app” option. Once you click the stock, Photos app for Windows 10 will open and then you can see the messages presented. Phone Companion will add all your Android photos and videos to the “Pictures” file on your Window 10 by default. In this way, you can move photos from Android to Windows 10.
Cons: One disadvantage of using this method is that you could only put all the photos into transfer while there’s no option for selecting the photos you want to move. And if there’re videos under Gallery, they will be moved along with the photos to your PC, which is quite inconvenient. You may utilize many other good Phone Companion alternatives to help you overcome this defect, like the method below.
Wirelessly Move Android photos to Windows 10 by using AirMore
AirMore is a free online app which is specialized in managing various mobile files. It is also famed for its high efficiency in transferring files. Users can quickly transfer photos, videos, music, documents, etc. between PC and Android without using USB cable. Now get started with steps below.
- Go to Google Play to download AirMore and then install it on your Android phone.
- Visit “airmore.net” on Google, Firefox, Safari, IE or Microsoft Edge and scan the QR code to build connection between PC and your Android. Ensure that your phone and computer are under the same WiFi network.
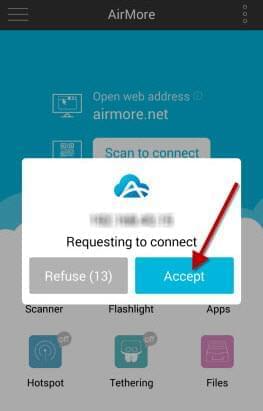
- Choose “Accept” when a pop-up window of “Requesting to connect” appears on your handset.
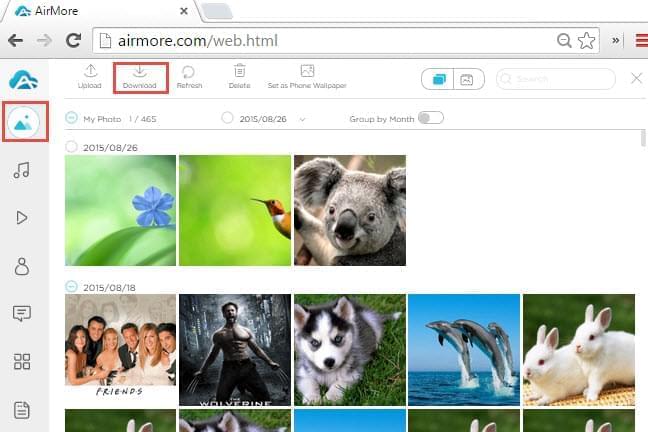
- Once connected, click “Photos” icon on the left side and then all your pictures which are stored on your device will be displayed.
- Choose those photos you want to transfer and then click “Download” button to move your photos from Android to Windows 10. If you need to transfer three or more images to Windows PC, they will package these photos into a zip file.
As a multi-functional tool, AirMore is also endowed with other useful functions. You can use it to delete other files from your Android on the web and install or uninstall your Android apps.
In addition to using Microsoft Phone Companion and AirMore, you can also use many other tools like Apowersoft Phone Manager to transfer photos from Android to Window 10. This Phone Manager is not only a good photo transfer tool, but also makes a comprehensive management for your Android and iOS devices.

Leave a Comment