One of the often used features of any mobile devices is the “Screenshot”. By the use of this feature, users can share the captured images easily and use or save the screenshots for future references. If you have upgraded your Android OS to the latest Android Q, you may be confused of how to take screenshots on Android Q or Android 10. To learn on how to this, check the methods introduced below.
How to Take Screenshots on Android Q
Take Screenshot on Android Manually
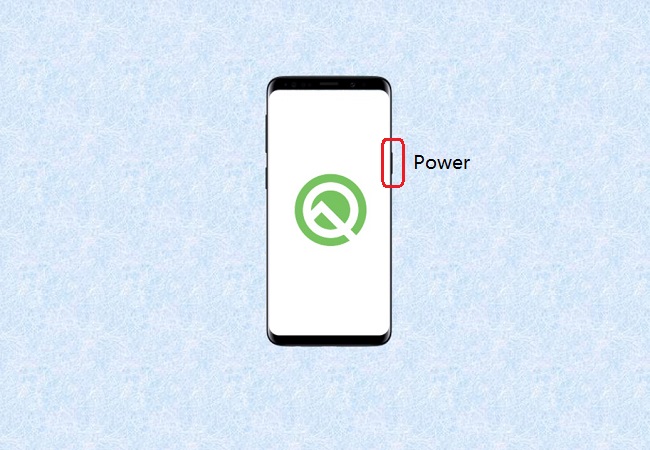
The easiest way to capture an image on your Android Q’s screen is by doing it manually. Almost every mobile devices comes with this feature and have their own unique ways on how to use it. Some needs to hold several buttons simultaneously while others can do it from their control panel. To take a screenshot on Android Q, just follow the steps below.
- Hold the “Power” button of your Android Q.
- A command line will appear at the bottom of your screen.
- Tap “Screenshot” to successfully take a screenshot.

Screenshot Android Q using AirMore
AirMore is a great tool you can rely on to take a screenshot on your Android Q device. It is a web-based app that allows you to transfer files from phone to PC and vice versa. In addition, you can use this tool to record and take a screenshot on your Android phone’s screen and even mirror your phone to PC. With that being said, to learn how to screenshot Android Q devices’ screen using AirMore, you can refer to the steps below.
- Download and install the app on your Android device.
- Open a browser on your PC, visit the webpage of AirMore.
Note: Make sure to connect your phone and PC to the same internet connection.
- To connect, on the webpage, click the “Launch AirMore Web to Connect” button.
- Open the AirMore app on your phone running Android Q, and tap to scan the QR code shown on your computer to establish connection.
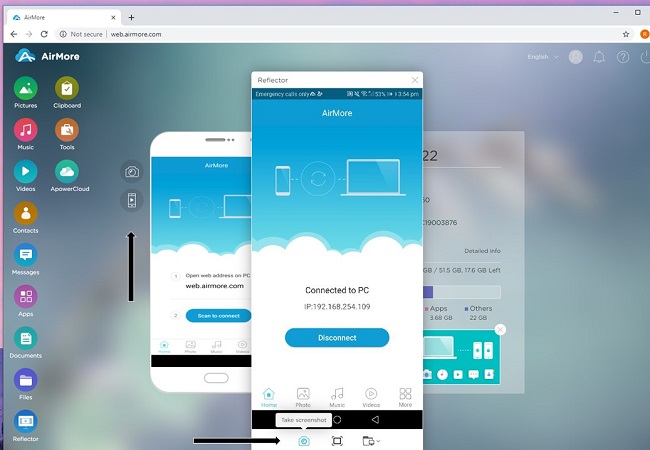
- Once connected, click the “Take screenshot” button or the “Reflector” button, then your phone screen will be mirrored to your PC. You can now capture screen on Android Q by clicking the “Take screenshot” icon.

Capture Android Q screen with Apowersoft Screen Recorder
Apowersoft Screen Recorder is an app that you can use to record the activities displayed on your Android phone’s screen and take screenshots on your Android. It has a user-friendly interface and is easy to use. Here is how to take Android Q screenshot using this screen capture tool.
- Download and Install the app on your phone running Android Q.
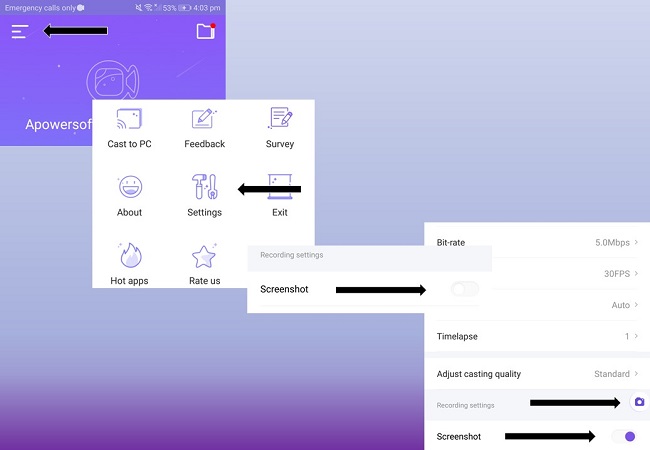
- Enable screenshot feature. Open the app on your phone, click the “Menu” icon at the top left, then tap “Settings”, and from there, enable the “Screenshot” option.
- Afterwards, a “screenshot” icon will appear on your screen that you can use to take a screenshot whenever you want.
- Just simply tap the “Screenshot” button to take a screenshot.

Conclusion
That’s how easy to take screenshot on Android 10, Android Q or any Android devices. By following the practical ways mentioned above, you can now easily take a screenshot that you can save or share anytime. In addition, since you come across to AirMore, you can also use other amazing functions like screen mirroring and file transfer of this tool.
Leave a Comment