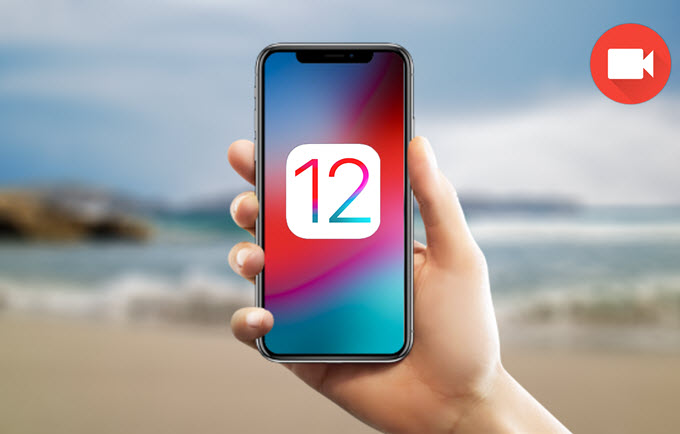
Launched this September, iOS 12 is the latest update of iOS that comes bundled with some new and exciting features that iOS enthusiasts will surely love. It is designed to make your iOS devices more responsive and faster compared with the previous version of Apple’s operating system. In some cases, you may want to create screen recording in iOS 12. Let’s find out the best ways to capture your iOS 12 screen.
How to Record iOS 12 Screen
iOS 12 built-in screen recording features
iOS 12 has a built-in screen recorder, which was landed when the iOS 11 was released. With this feature, you can record the screen of your iOS device without installing any third party applications. It lets you capture your gameplay, video calls, app tutorials, and a lot more. Even better, it allows you to record iOS 12 screen with audio through the microphone. Simply follow the steps below to capture and record your screen in iOS 12.
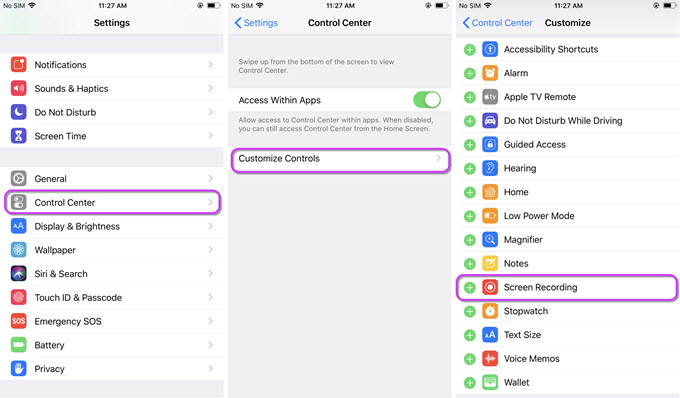
- On your iOS 12-based Apple device, head to “Settings” > “Control Center” > “Customize Controls”, then look for “+ Screen Recording” and tap to add this feature to the Control Center.
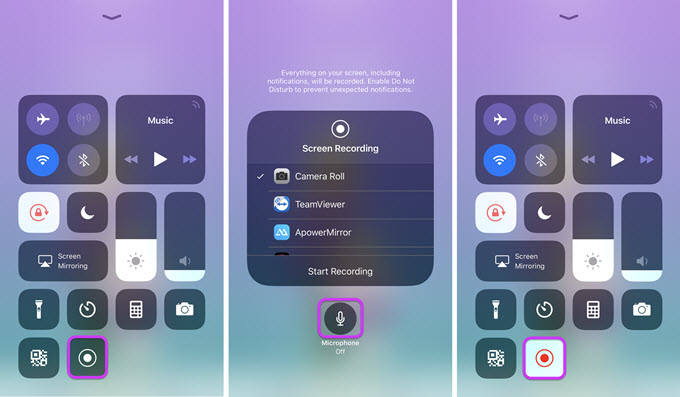
- To start recording, swipe up to open the Control Center, then tap the “Record” button. If you want to record audio through your microphone, press and hold the “Record” button and then turn on the microphone. Afterwards, you can start recording your iOS 12 screen.
- Once you are finished, open the Control Center and tap again the “Record” button to stop it.
ApowerMirror
If you want a screen recorder program that allows you to mirror your iOS 12 screen to your PC or Mac and record it from there, then you should use ApowerMirror. With this app, you can record any screen activities on your phone while it is being mirrored onto a bigger screen like your Windows PC or Mac, including playing games, watching live streaming videos, and so on and so forth. Here is a detailed guide that explains how to record iOS 12 screen using ApowerMirror.
- Download the program and install it on your computer. On your iOS 12 device, install the application from the App Store.
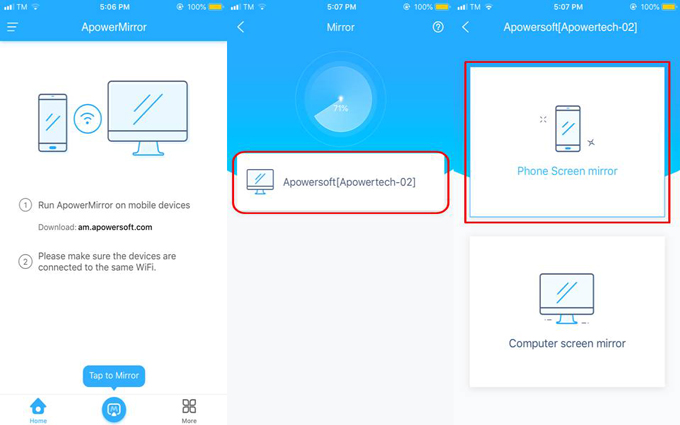
- After the installation, launch the application on both your computer and iOS 12 device. Tap the blue “M” button on the lower part of the app interface of your device to start detecting available devices. Once detected, tap the name of your computer then “Phone Screen Mirror”.
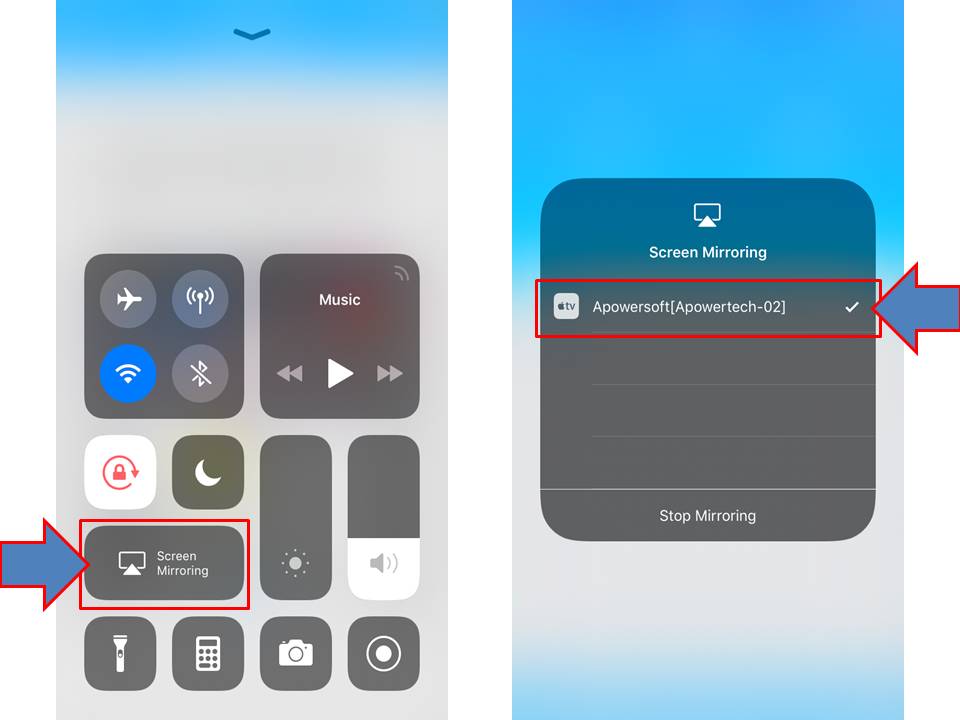
- Open the Control Center. Tap “Screen Mirroring”, then select your computer’s name. The screen of your iOS device is now reflected to the screen of your PC.
- After that, click the recorder icon on the right toolbar to start recording.
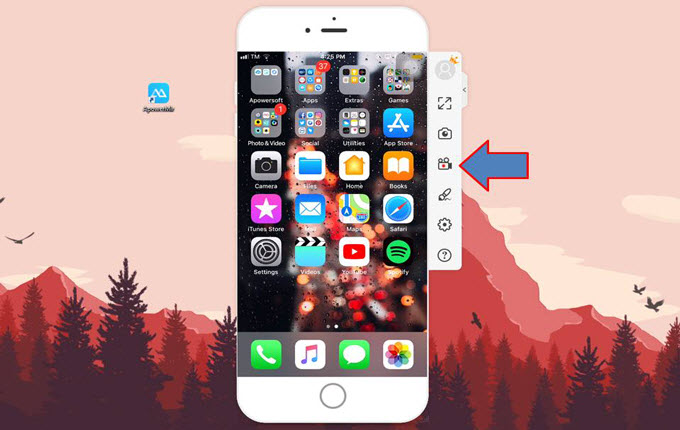
- When you are done, hit the “Stop” button to end it. Then the recording file will be automatically saved, and you can check it immediately.
Conclusion
The two iOS 12 screen recording methods discussed above are both practical and reliable, something that can certainly help you create a high-quality screen recording. Both tools have unique screen recording functions, but ApowerMirror gives some added features and benefits compared to the native screen recording capabilities of iOS 12.


Leave a Comment