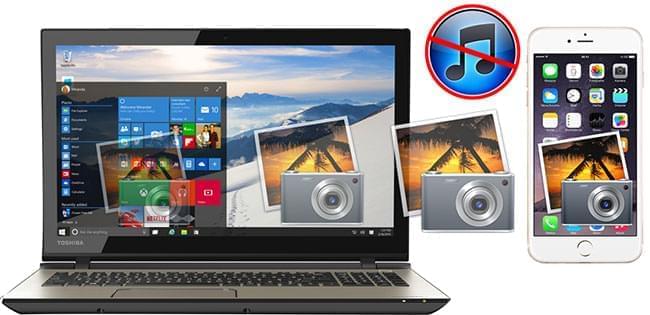
As we all know, iTunes is the most frequently-used tool when iPhone users want to transfer data between mobile devices and PC, such as photos, music and videos. However, the whole transfer process can be complicated. First, you have to download and install the latest version of iTunes. Second, you need to connect your iPhone to PC with the matched USB cable. Third, when transferring photos, you can only select a certain folder rather than specific photos which is inconvenient. Finally, you should be careful when you sync photos – if you click the wrong button by accident, you might lose important data forever. So, many users have trouble in importing photos to their iPhone. Luckily, here are simple methods on how to transfer photos to iPhone without iTunes.
Easy ways to move photos to iPhone without iTunes
AirMore – Manage your iPhone photos wirelessly
AirMore is a powerful mobile devices management tool based on web which perfectly supports Android and iOS handsets. With it, you can transfer photos from PC to iPhone without iTunes. Let’s see how this smart tool works.
- Download and install AirMore app on your iPhone from App Store.
- Visit the “airmore.net” through Google Chrome, Firefox or Safari to load a QR code.

- Run the app on your iPhone and click “Scan to connect” to scan the QR on the PC screen. In order to connect successfully, please set up your iPhone and PC in the same Wi-Fi network.
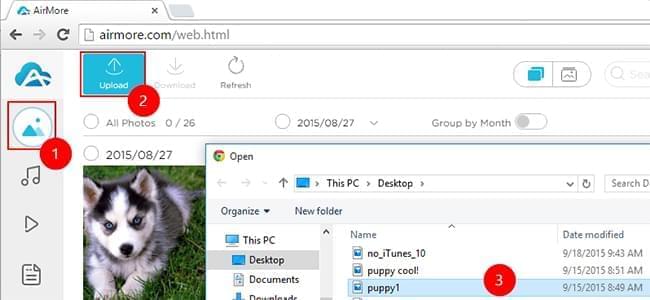
- Once connected, you can tap the “Pictures” icon on the interface and then hit “Upload” button to select photos on your PC.

Just for a while, all photos will be transferred to your iPhone successfully provided that your network is pretty smooth.
Tips:
There are two ways to view these photos on your iOS device. First, you can open AirMore app on your phone and tap “Media” icon at the bottom of the screen to check transferred photos. Second, you can also find them in iPhone’s default photos library.
Pros:
- Free for all.
- With a very clear interface and layout, you’ll make it very easily.
Cons:
- It needs network connection.
If you are reluctant to download any app on your mobile device, you may turn to the method below.
iCloud – the default transfer tool for iOS users
iCloud stores every photo you take, making them accessible from your iPhone and iCloud.com. You can set up your iCloud account on your iPhone and then go to the iCloud.com to upload photos.
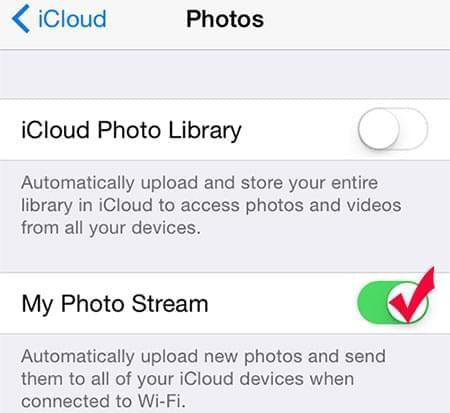
- Open “Settings” > “iCloud” and sign in your Apple ID on iPhone. Then you should turn on “My Photo Stream” option under “Photos”.
- Visit “iCloud.com” through your PC browser and sign in the same Apple ID.
- Click the “Photos” icon and then you can transfer photos to iPhone without iTunes by hitting the “Upload” button on the upper right corner.


Cons:
- It’s not completely free. In fact, iCloud only provides users with 5 GB space free of charge. It’s obvious that 5 GB is surely not sufficient for users today. As the pixel of iPhone camera is becoming increasingly high, each photo you take will eat up lots of your iCloud storage. Thus, 5 GB is not able to store too many HD photos in such a way. If you want to continue using iCloud, you have to purchase more space.
- It fails to show photos uploaded on your iPhone immediately.
- You must have an Apple ID, or you cannot do anything with iCloud.
Conclusion
From the introduction above, you would grasp two methods on how to transfer photos to iPhone without iTunes. While taking all aspects into consideration, AirMore will be your better choice. Actually, you can also use AirMore to transfer music, videos, documents and other files to your iPhone wirelessly. You may be eager to check it out now!
Leave a Comment