The recent iOS 9.1 update has been released by Apple. This new version fixed some bugs and added new features. For one thing, it’s supportive for Unicode 7 and 8 which contain many new emojis such as unicorn head, cheese wedge, burrito and taco. For another, it is compatible with the upcoming iPad Pro and 4th generation Apple TV. Besides, the Live Photos is improved in that it will stop recording once it detects that iPhone is lowered. This can avoid recording unnecessary movement. However, some users find their battery being drained quicker than it used to. Moreover, jailbreaking is no longer possible with this version. If you are experiencing these problems, you may want to downgrade iOS 9.1 to iOS 9. In this post, I’ll introduce two ways to achieve it with detailed process so that you can determine which one is more convenient for you.
Note that both need to use iTunes and download iOS 9.0.2 firmware file for your iPhone. Also, downgrading is only possible when Apple allows signing in to iOS 9.
How to Downgrade iOS 9.1
Method One: Restore from Backup
Our first solution not only lets you downgrade iOS 9.1 to 9.0.2, but also allows you to restore your personal data. However, this process can be a little time-consuming. Let’s begin with the steps.
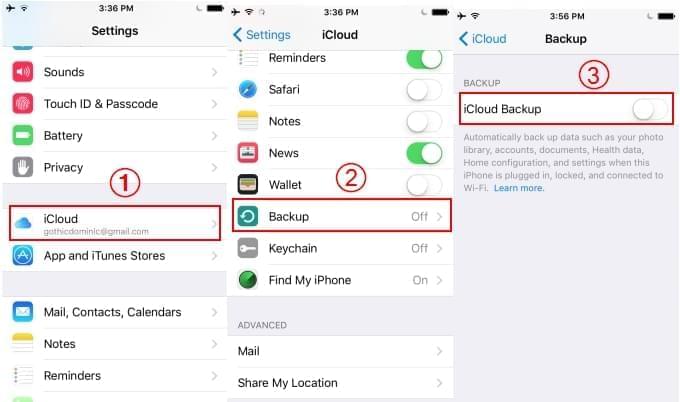
- Backup your data by going to “Settings” > “iCloud” > “Backup”.
- Download the iOS 9.0.2 firmware file appropriate for your device. Make sure to download the right file. If using Safari for download, remember to disable the auto zip feature. Or else you need to rename the .zip file to .ipsw. Using browsers like Firefox or Chrome will effectively prevent the compressing of files.
- Connect your iPhone to PC. And turn your device to DFU (Device Firmware Upgrade) mode.
- You will then get a window from iTunes telling you that your device is in recovery mode. Click “OK”.
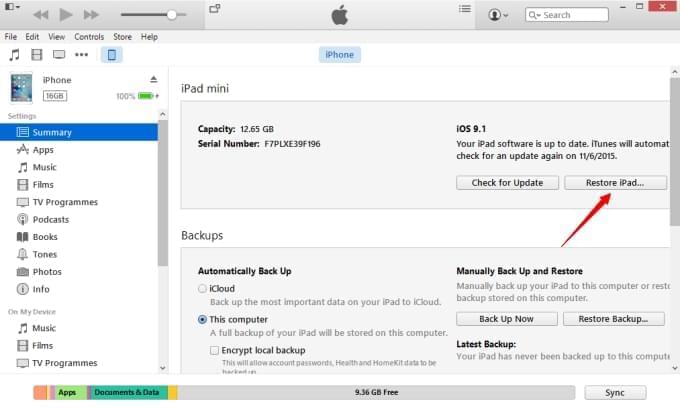
- Hold the Shift key on Windows or Alt/Option key on Mac and click “Restore iPhone”.
- Choose the iOS 9.0.2 file that you downloaded from your browser.
- Select “restore and update”. After that, click “next” and choose “agree”.
- iTunes will start downloading and installing iOS 9.0.2 on your device. Once done, you will be led to the process of restoring your back up data.


Method Two: Check for Update
Our second method to downgrade iOS 9.1 is quicker, but it wouldn’t automatically restore your backup. If you want your personal data back, then you need to do it manually. Below is the process.
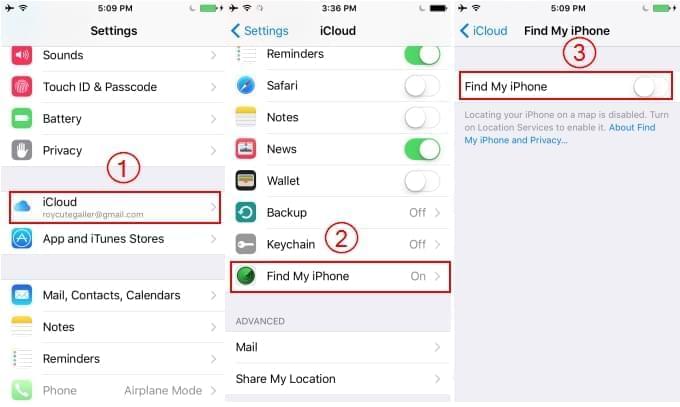
- Disable “Find my iPhone” by going to “Settings” then “iCloud”.
- If you have a 6-digit passcode, change it to 4 digits as iOS 9.0.2 would not recognize it.
- Repeat the steps in method one to ownload the iOS 9.0.2 firmware file appropriate for your device.
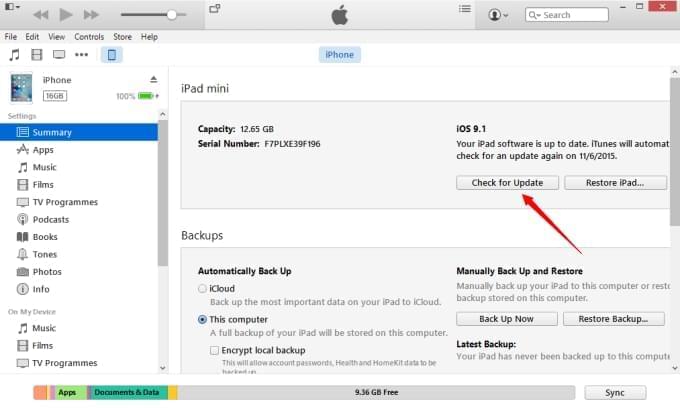
- Connect your iPhone to your computer. Then open iTunes and select your iOS device on the upper left side of the window.
- Hold the Shift key on Windows or Alt/Option key on Mac and click “Check for Update”.
- Choose the downloaded iOS 9.0.2 IPSW file.
- Select “Update”.
- Your iPhone will restart and you’ll see the “Slide to Upgrade” message. Slide and enter your passcode. Once the downgrade process is finished, you may be asked to activate your device.


Conclusion
The methods that we tackled on how to downgrade iOS 9.1 to 9.0.2 can both meet your needs. By comparison, the first method takes more time but it would restore your data from your backup, while the second is faster but you cannot get your personal data back. After going back to iPhone 9.0.2, you can jailbreak your iPhone without restrictions.
Leave a Comment