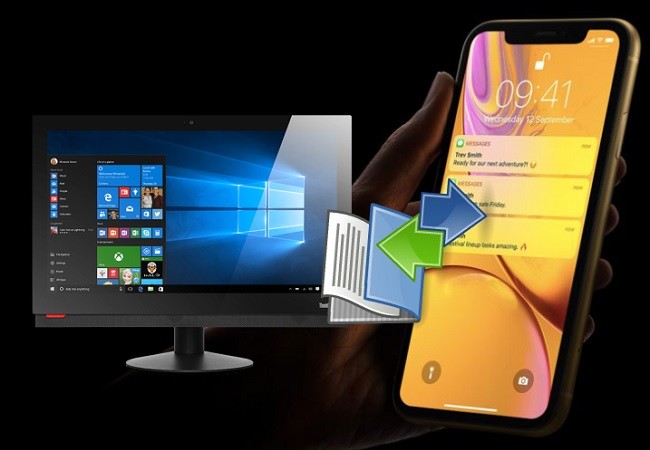
iPhone is well known for its high configurations. Among others, its quality camera is very attractive for many people. Most iPhone users tend to use it as a substitution for professional camera to record uncommon moments in their life. However, after taking a certain amount of photos and videos, you may find the iPhone storage is almost full. One good solution is to transfer the space-consuming videos to computer. Some could have known the way to copy videos to Windows 8/7/XP, but the process is quite different when it comes to this brand new Windows 10. Now, let’s see how to transfer videos from iPhone to Windows 10 easily.
3 Simplest Methods to Transfer iPhone Videos to Windows 10
ApowerManager
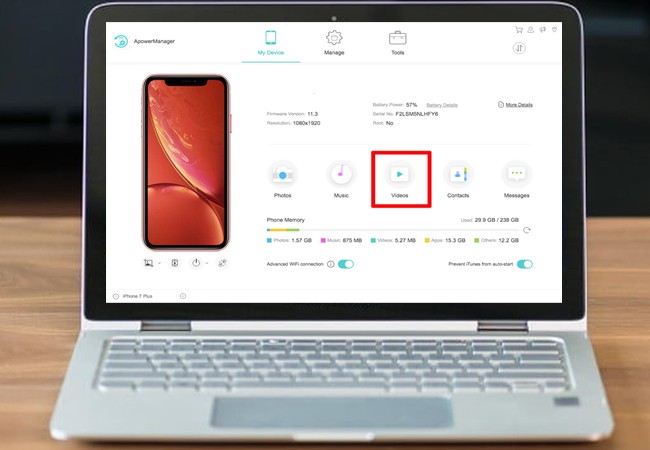
Windows or not, new or later versions of Windows, ApowerManager is the answer to your data transfer needs. ApowerManager is a professional phone manager. It can import-export files fast. Through the tool, it is easier to manage files, messages, contacts, and apps on your mobile device to your computer. What is good about it is that it works with iOS, even without using iTunes. You can freely access all your files just by merely connecting wirelessly. Also, you can back up your files if you want to keep a copy of your files. On top of that, while working on your PC, you can receive/send messages and calls even without navigating on your phone. If you are curious about how this tool works, here is a guide on how to transfer videos from iPhone to Windows 10.
- Download and install the app on your PC by using the download button below.
- Launch the app on your phone and PC. Now, get a USB cable and connect it on both ends of the devices.
- Once recognized, files will be displayed on the interface of the tool.
- Now click on the “Video” folder and select the files you want to transfer.
- Finally, click the “Export” button to transfer the video on your PC.
Airmore
Whether you are using Windows 10 or the previous Windows systems, AirMore is always your best way to transfer files between iPhone and computer. This handy app can be used on any computer as long as it has installed Chrome, Firefox or Safari browser. Its powerful features have received many compliments from users. With it, you can conveniently manage your iPhone photos, music, videos, documents and others on web. Here, in order to upload iPhone videos to Windows 10, please refer to the following guide.
Get this app from App Store. Its icon is a blue cloud, which you can easily recognize. You can also use the download button below.
- Open one of the browsers mentioned above and visit “airmore.net” to establish a connection.
- Connect iPhone to PC wirelessly. Firstly, make sure your computer/laptop and iPhone are connected to the same Wi-Fi. Then open the application on your iPhone and tap “Scan to connect”. Lastly, use the phone to scan the QR code on web.
- After connection, click “Videos” icon. On the interface, all the videos in your iPhone will be displayed. Choose the ones you’d like to transfer and click “Download” button on top.
Tips: For your convenience, it will download one or two videos separately while compress three or more into a zip.

To help you better judge whether this way is suitable for you, here list some of its advantages and disadvantages.
Pros:
- Frees you from USB cable or any desktop client.
- Allows you to transfer the videos you take or download.
- Provides you comprehensive management of your iPhone data.
- Works on any computer operating system.
- Presents user-friendly interface.
Cons:
- Requires accessibility to internet.
- Doesn’t support Microsoft Edge yet.
Default transfer program
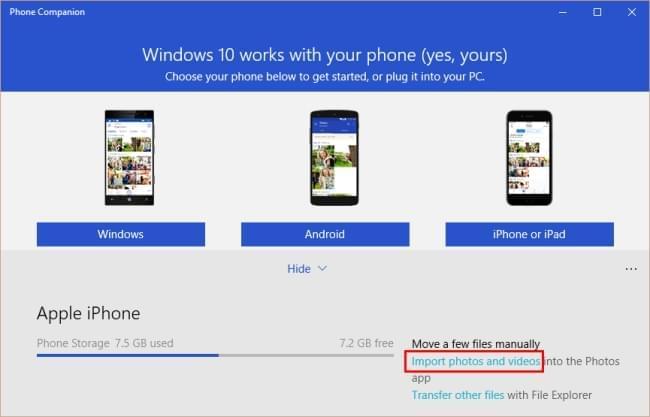
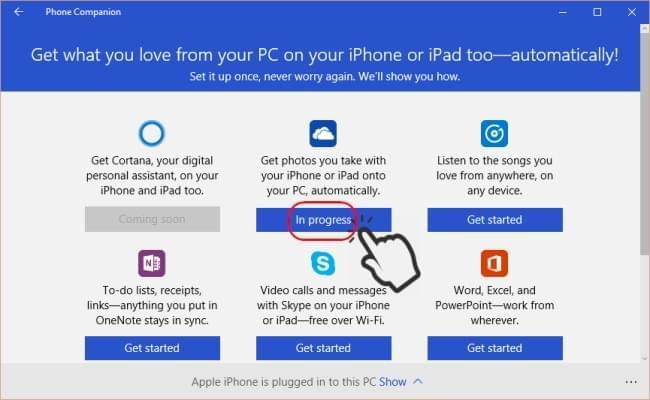
Those who have upgraded their computer to Windows 10 probably have heard about this built-in phone data transfer program. Phone Companion considerately provides a channel for all kinds of phones, including Windows, Android, and iPhone or iPad, to sync files to PC with ease. With the assistance of it, you can adopt either way below to import videos from iPhone to a computer with Windows 10.
Copy videos from iPhone to Windows 10 manually
- Connect your iPhone to computer with matched USB cable.
- Open the program on your computer. You will see a notification below says “Apple iPhone is plugged in to this PC”. Click “Show” and then “Import photos and videos”.
- The Photos app will come out with a prompt. Click “Import” to so that you can transfer the photos and videos into the Photos app.
In this way, you are able to manually import videos to PC. There’re also some merits and drawbacks you need to know about this method.
Pros:
- Allows you to transfer recorded or downloaded videos.
- Transfers all the videos without any delay or loss.
- Needs no installation on your iPhone or computer.
- Doesn’t require internet accessibility.
Cons:
- Demands a USB cable.
- Transfers all the photos and videos in batch.
- Cannot manually choose which folder to store the imported files.
- Displays the media files in a messy way.
Sync iPhone videos to Windows 10 automatically
- Open Phone Companion. Click “iPhone or iPad” afterwards.
- Select “OneDrive” icon. Follow the instruction to install OneDrive app on your iOS device.
- Open the application and sign in with the same Microsoft account you use on your computer.
- Turn on “Camera Upload” function. Within few minutes, you should see the recorded videos in Photos app on PC.
This method allows you to sync all the photos and videos taken by your iPhone to PC automatically. However, keep the following information below in mind to make sure it’s the right way for you.
Pros:
- Moves the media files to PC wirelessly.
- Helps you to get rid of the transferring process.
Cons:
- May fail to upload the videos to OneDrive when using mobile network.
- Bundled your mobile transfer with Microsoft account could put you in risk.
- Can only transfer the videos recorded with your iPhone.
All of the above ways can meet your needs on moving videos from iPhone to PC running Windows 10. They are also applicable if you want to transfer photos from iPhone to Windows 10. Each of them has its strengths and deficiencies. But in general, AirMore is more recommended, because it has much more features which enable you to manage your iPhone data comprehensively.
Leave a Comment